![]()
![]()
![]()
![]()
![]()
![]()
![]()
![]()
![]()
![]()
![]()
![]()
![]()
![]()
![]()
![]()
![]()
![]()
![]()
![]()
![]()
![]()
![]()
![]()
Station Construction
Part I, Foundation Work
 I
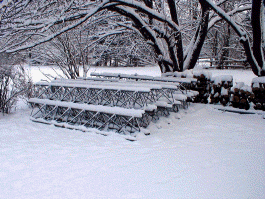
acquired the tower sections right after we moved into our new house.
However, mother nature had different ideas. The snow started very early in
the winter, and the back yard had three feet of snow in it until early March.
I
acquired the tower sections right after we moved into our new house.
However, mother nature had different ideas. The snow started very early in
the winter, and the back yard had three feet of snow in it until early March.
The only thing we got done before the snows came was to have Roger, K1DQV, come over with his transit and mark out the tower bases and guy anchor locations, and determine the elevations of the holes. We put out little orange landscaping flags which promptly disappeared in the snow.
After that, it rained most of the spring, and we were not able to break ground until a brief dry period in the last week of June. So I spent most of my time planning the installation, gathering the necessary antennas and other hardware, and building the rebar cages for the guy anchors.
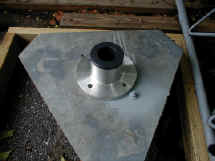
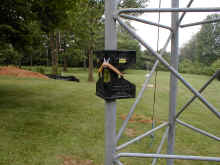
I received suggestions from several sources to avoid using Rohn thrust bearings. It seems like they inevitably fail at some point. So I enlisted the help of another PVRCer, Maurice, KA3EJJ, to make custom thrust bushings for my towers with no moving parts to fail, that had the same footprint as a Rohn TB-3.
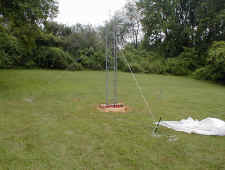
The back yard was just large enough to comfortably fit two 100 foot (30 meter) Rohn 45G guyed towers. As soon as the rains stopped, I enlisted the help of Charlie, KA3IWP, to help me dig the foundation holes. Charlie is an expert loader operator, and does most of the holes for W3LPL.
 The
anchor rods were coated with bituminous to avoid corrosion, which is available
in one gallon cans from any roofing supplier, including Home Depot. This
is important, the tower legs should be coated also a few inches above and
below the level of the concrete base, and the base should be finished in a
manner that water will drain from the legs.
The
anchor rods were coated with bituminous to avoid corrosion, which is available
in one gallon cans from any roofing supplier, including Home Depot. This
is important, the tower legs should be coated also a few inches above and
below the level of the concrete base, and the base should be finished in a
manner that water will drain from the legs.
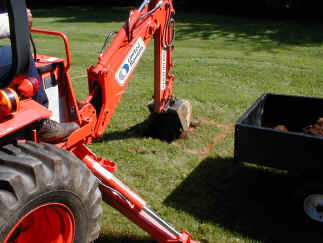
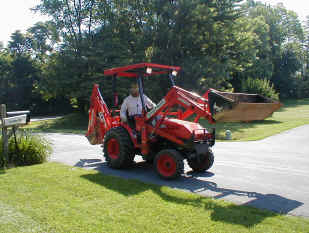 After
getting some prices from contractors, and after talking to W3LPL, I decided to
do the tower base and anchor holes myself, with the help of KA3IWP. I
rented a loader, and towed it home on a trailer. Here is a picture of
Charlie trying out the loader.
After
getting some prices from contractors, and after talking to W3LPL, I decided to
do the tower base and anchor holes myself, with the help of KA3IWP. I
rented a loader, and towed it home on a trailer. Here is a picture of
Charlie trying out the loader.
If you don't want to tear up your grass, avoid a "skid steer" loader like a Bobcat. Use a "wheel steer" loader such as a Teramite or Kubota.
Finally, in the last week of June, the base and anchor holes were marked, and we finally broke ground with the loader.
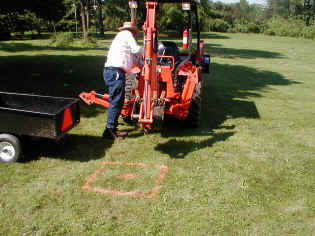 Here
Charlie moves the loader into position and prepares to start the first tower
base hole. We hit a lot of rocks on the first hole, and really had to work
hard to get them all out of the hole.
Here
Charlie moves the loader into position and prepares to start the first tower
base hole. We hit a lot of rocks on the first hole, and really had to work
hard to get them all out of the hole.
Charlie says I was particular about my holes. The plans said they needed to be four feet deep, and two and a half feet square. Working the rocks out of the hole caused it to get wider, and it ended up about three feet square and four feet deep. That was not a problem, but it has to be taken into account when calculating the amount of concrete to order.
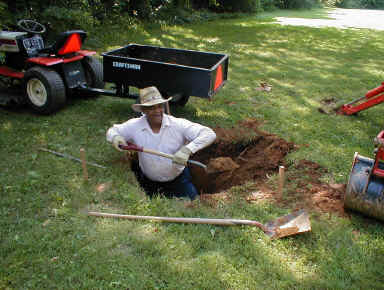
 Finally,
after ten months of waiting, ground has been broken on the first tower base.
Finally,
after ten months of waiting, ground has been broken on the first tower base.
I wanted to keep the back yard clean, so I had Charlie put all the dirt from the holes into my lawn tractor's trailer. That made a lot more work, but kept the yard clean, plus I had a need for the dirt in another part of the yard. So we hauled the dirt away on both tower bases, and several of the anchor holes.
The holes went pretty fast, we dug two tower bases and a couple anchor holes the first day, and the rest of the anchor holes the second day.
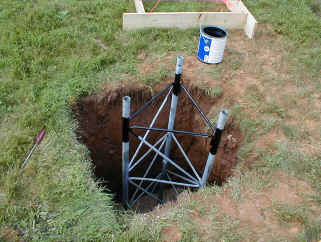 Then
the drainage gravel is put into the holes, and the short base (SB5) is test
fitted into the hole. The tower legs are coated with bituminous a few inches above and
below where the surface of the concrete will be.
Then
the drainage gravel is put into the holes, and the short base (SB5) is test
fitted into the hole. The tower legs are coated with bituminous a few inches above and
below where the surface of the concrete will be.
The drainage gravel is extremely important with hollow tubular leg towers. The legs must extend below the concrete, into the gravel, to allow any water that gets into the leg to drain freely. If you do not do this, and you do get water in the tower legs, the legs can split when water freezes in them, or they can corrode from the inside out. That is why taking down an older guyed tower can be dangerous, especially if it was not installed correctly.
 Here
is a picture of the tower base in the hole, with the legs in the drainage
gravel. The forms to provide the six inches of concrete above grade are
staked into place. Note the string on the form used to help align the
tower properly in the base hole so that it is aligned properly with the guy
anchors.
Here
is a picture of the tower base in the hole, with the legs in the drainage
gravel. The forms to provide the six inches of concrete above grade are
staked into place. Note the string on the form used to help align the
tower properly in the base hole so that it is aligned properly with the guy
anchors.
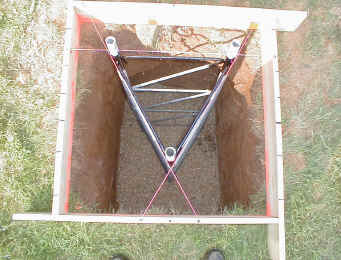
You will notice there is no rebar in the tower base. When using a short base, the base itself performs the function that rebar would. If you do a pier-pin installation, rebar would be required in the base holes.
 The
forms are staked into position, and I used drywall screws and a battery drill to
hold the forms to the stakes. A couple 2x4s are used across the top of the
forms to keep the base from sinking too far into the gravel.
The
forms are staked into position, and I used drywall screws and a battery drill to
hold the forms to the stakes. A couple 2x4s are used across the top of the
forms to keep the base from sinking too far into the gravel.
I decided to attach the first ten foot section to the short base, in order to level the base and keep it from moving. Concrete is very heavy, and when it starts hitting the base when you pour, it can really move things around. The base has to be completely secure before you start pouring concrete.
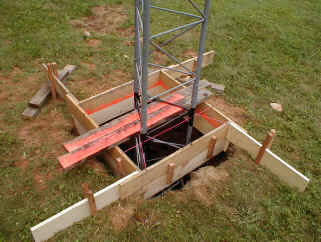
 A
strap-on corner level is used to level the ten foot section sticking out of the
hole, and short rope guys hold the base in position and level. Short fence
stakes are pounded into the ground to be the anchor for the temporary rope
guys. Once the base is level, and secured so it can't move up or down, you
are ready to pour the concrete!
A
strap-on corner level is used to level the ten foot section sticking out of the
hole, and short rope guys hold the base in position and level. Short fence
stakes are pounded into the ground to be the anchor for the temporary rope
guys. Once the base is level, and secured so it can't move up or down, you
are ready to pour the concrete!
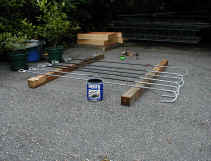
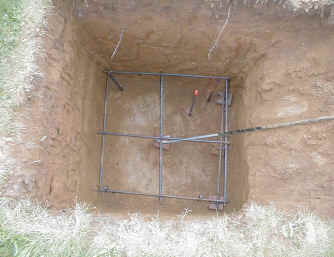 The
guy anchor holes did require a small rebar cage. I rented a rebar
bender/cutter to make it easier to make the cage. The rebar is tied
together using metal wire ties, which are available in rolls or precut ties -
use the precut pieces, it makes it much easier.
The
guy anchor holes did require a small rebar cage. I rented a rebar
bender/cutter to make it easier to make the cage. The rebar is tied
together using metal wire ties, which are available in rolls or precut ties -
use the precut pieces, it makes it much easier.
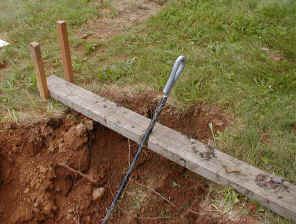
A small section of rebar was pounded into the ground and painted orange as a grade stake to indicate the correct depth of concrete needed in the hole.
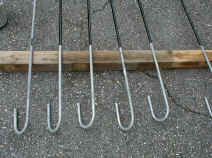
The rebar and end of the anchor rod is supported off the dirt by small pieces of brick, and held in place by sections of rebar pounded into the ground. Concrete is heavy, once it hits the rebar cage and anchor rod, it really tried to move things around.
The end of the anchor rod is held in position by a piece of 2x4 with a notch cut in it, and the 2x4 is staked into position so it cannot move.
I did not want the concrete truck in the back yard, or on the driveway, so it was suggested to me that I rent a "Georgia Buggy", which is a powered self-propelled buggy that can haul a half yard of concrete at a time.
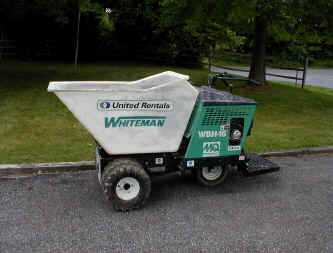 That
turned out to be an excellent suggestion. The concrete truck stayed out on
the main road, and I drove the buggy back and forth to pick up a half yard of
concrete at a time. It took about a dozen trips back and forth to do the
two towers.
That
turned out to be an excellent suggestion. The concrete truck stayed out on
the main road, and I drove the buggy back and forth to pick up a half yard of
concrete at a time. It took about a dozen trips back and forth to do the
two towers.
This can be rented too, and trailered home on an equipment trailer, or most rental companies will deliver it for an additional fee.
The buggy is easy to drive, kind of drives like a motorcycle, except you stand on the place at the rear of the buggy, and steer it with the handlebars. The dump is controlled with a hydraulic lever which makes it very easy to control how fast the concrete dumps.
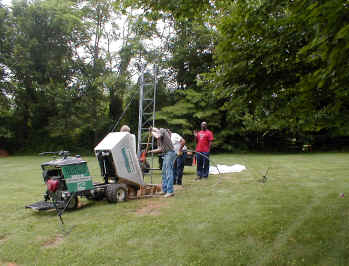 Here
the concrete is poured into the base hole, while Charlie runs the electric
vibrator for a couple seconds every so often. The guy in the red shirt is
the concrete truck driver. He thought the buggy was pretty cool so he
walked out back to see how it worked, and he was also curious just what the heck
we were making in the back yard!
Here
the concrete is poured into the base hole, while Charlie runs the electric
vibrator for a couple seconds every so often. The guy in the red shirt is
the concrete truck driver. He thought the buggy was pretty cool so he
walked out back to see how it worked, and he was also curious just what the heck
we were making in the back yard!
The vibrator is really essential. You can rent that too. Some say you don't need it, but it really made things much easier. Concrete is really heavy stuff, and the vibrator turns it to the consistency of water and really gets it into all the nooks and crannies properly.
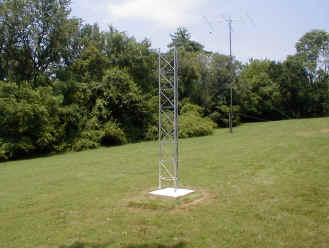 After
the base is poured, the forms are knocked off, and the extra ten foot section
and temporary guys were removed, revealing a nice base pad, properly finished to
allow water to drain away from the tower legs.
After
the base is poured, the forms are knocked off, and the extra ten foot section
and temporary guys were removed, revealing a nice base pad, properly finished to
allow water to drain away from the tower legs.
Continue to Part II, Erecting the Towers